
Wear it: Viking Steel
Premium Norse-inspired apparel, made on demand.
🇺🇸 Fast US shipping · 🇪🇺 Ships across the EU · 🔒 Secure checkout
The soul of the north: understanding the viking axe
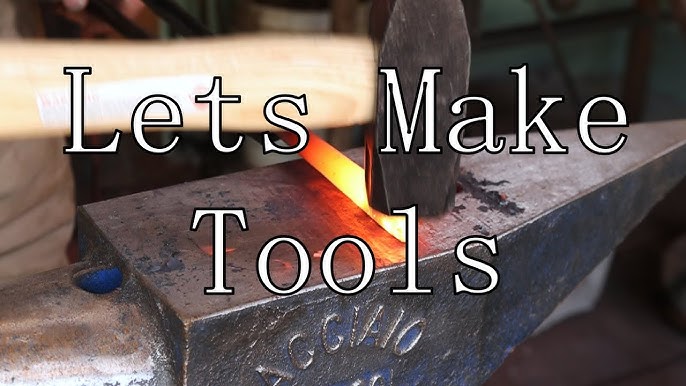
The clang of a hammer on steel is a sound that echoes through the centuries, a rhythm that connects us to the very heart of the Norse world. For the Vikings, the axe was more than a weapon of war; it was an indispensable tool, a symbol of status, and a trusted companion. From carving the intricate prows of their legendary longships to cleaving a shield in the heat of battle, the axe was the extension of a Viking’s will. To forge a Viking axe is to do more than simply shape metal; it is to rekindle the spirit of an age defined by resilience, craftsmanship, and a deep connection to the raw elements of the earth.
Unlike the romanticized, oversized fantasy axes often seen in media, the historical Viking axe was a masterclass in efficiency and design. It was lightweight, perfectly balanced, and brutally effective. The bearded axe, with its characteristic downward-swept blade, allowed for hooking shields or limbs, while its relatively thin profile made it a wicked-fast cutting tool. The materials were simple—iron and steel—but the techniques used by Norse blacksmiths were sophisticated, often involving forge-welding a hard steel cutting edge onto a softer, more durable iron body. This created an axe that could hold a razor-sharp edge while resisting the shock of impact.
In this guide, we will walk you through the ancient process, adapted for the modern workshop. We will explore the tools, the techniques, and the patience required to transform a simple bar of steel into a functional piece of history. This journey is not for the faint of heart. It requires fire, sweat, and a respect for the craft. But for those who feel the call of the forge, the reward is immeasurable: a tangible link to the Viking smiths who came before us, held in the palm of your hand. So, stoke the fire, gather your tools, and let us begin the process of forging a Viking axe like a true Norse blacksmith.
Gathering your materials: the foundation of the forge
Before the first spark can fly, a blacksmith must prepare their workshop. A Norse smith’s workspace was a sanctuary of creation, a place where fire and iron were bent to their will. While you may have access to modern conveniences, the fundamental tools remain timeless. Respect for these tools is paramount, as they are your partners in this elemental dance.

The Steel: The Heart of the Axe
The most crucial choice is your steel. A traditional Viking axe was often made with a soft iron body and a high-carbon steel bit forge-welded for the cutting edge. This technique saved precious high-carbon steel and created a more resilient tool. For a modern smith, a solid piece of high-carbon steel is a more straightforward and equally effective approach. Look for steels like:
- 1060 or 1075 Carbon Steel: These are excellent choices for beginners and experienced smiths alike. They are forgiving to work with, heat-treat predictably, and can hold a fantastic edge while remaining tough.
- 5160 Spring Steel: Known for its incredible durability and toughness, this is another superb option, often reclaimed from vehicle leaf springs.
You will need a rectangular bar of steel. A piece roughly 1.5 inches wide, 1 inch thick, and 4-5 inches long is a good starting point for a typical bearded hatchet or small hand axe.
The Forge and Fuel: The Breath of Fire
Your forge is the altar where the transformation happens. A historical Viking forge was a simple charcoal-fueled clay or stone structure, often with a bellows made of wood and leather to feed air to the fire. Today, you have more options:
- Solid Fuel Forge: Using coal or charcoal, this type of forge offers a traditional experience and excellent, localized heat.
- Propane Forge: A modern gas forge provides clean, consistent, and easily controlled heat, making it a popular choice for many smiths.
The Anvil: The Smith’s Altar
The anvil is the unyielding surface upon which you will shape the steel. A good, heavy anvil with a flat face and a hardy hole (for holding tools) is essential. Its mass absorbs the energy of your hammer blows, directing it back into the workpiece.
The Hammers and Tongs: The Smith’s Hands
You don’t need dozens of hammers to start. A few key types will serve you well:
- Cross-Peen Hammer (2-3 lbs): This is your primary shaping tool. The flat face moves a lot of metal, while the peen is used for drawing out the steel (making it longer and thinner).
- Rounding Hammer: A versatile hammer with a rounded face and a flat face, excellent for general forging.
Tongs are your lifeline, allowing you to hold the glowing hot steel safely and securely. You will need at least one pair of tongs that can firmly grip your steel bar.
Safety First: The Modern Viking’s Armor
Norse smiths understood the dangers of their craft. You must too. Never enter the forge without:
- Safety Glasses: To protect your eyes from scale (hot flakes of metal) and sparks.
- Leather Apron and Gloves: To protect your body from heat and burns.
- Natural Fiber Clothing: Cotton or wool will not melt and stick to your skin like synthetic fabrics.
- A Fire Extinguisher and a Bucket of Water: Be prepared for any eventuality.
The rhythm of the hammer: shaping the axe head
With your forge lit and your tools at hand, the real work begins. This is where intellect, strength, and intuition merge. The process of forging an axe head is a sequence of controlled steps, each building upon the last. We will focus on the popular “wrap-around” method, which mimics the traditional technique of forming the eye.

Step 1: The Initial Forging and Splitting
Heat your steel bar to a bright orange-yellow color (around 1900-2000°F or 1040-1090°C). This is the proper forging temperature. Your first task is to isolate the material that will form the eye of the axe. Using your cross-peen hammer, you will begin to “neck down” the steel bar about one-third of the way from one end. This creates a thinner section. Once this is established, you will use a hot cut hardy or a chisel to split this thinner section down the middle. This split is the beginning of the two cheeks that will wrap around to form the eye.
Step 2: Drifting the Eye
After splitting, reheat the steel. Now, take an axe eye drift—a tapered steel tool—and begin hammering it into the split. Do not try to drive it all the way through at once. Work from one side, then flip the piece and work from the other. This process slowly opens the split into a recognizable oval or teardrop shape, which will become the hole for the handle (the haft). This is a critical stage; ensuring the eye is symmetrical and properly shaped is key to a well-balanced axe. The cheeks of the eye should be thicker than the eventual blade to provide strength.
Step 3: Forge-Welding the Body
Once the eye is roughly shaped, the two ends of the split section must be welded together to form the poll (the back of the axe). To do this, you must heat the steel to a near-white, sparking heat (around 2200-2300°F or 1200-1260°C). This is welding temperature. At this point, the steel becomes almost liquid. Apply a flux (like borax) to clean the surfaces and prevent oxidation. Quickly bring the piece to the anvil and hammer the two ends together with firm, rapid blows. They will fuse into a single, solid piece of steel. This is a challenging skill that requires practice, but it is immensely rewarding.
Step 4: Drawing Out the Blade and Beard
With the eye and poll formed, you can now focus on the blade. Reheat the remaining solid portion of the bar. Using the cross-peen of your hammer, begin drawing out the steel. Hammering with the peen spreads the steel directionally, allowing you to shape the distinctive downward curve of the bearded axe. Work methodically, thinning the blade towards the edge while leaving enough mass for strength. Flip and turn the piece constantly to keep the shape even. This is the most sculptural part of the process, where the final form of the axe truly emerges from the steel. Take your time, frequently reheating the metal to keep it at a workable temperature.
The final trial: heat treatment and hafting
Forging gives the axe its shape, but heat treatment gives it its soul. This metallurgical process is what turns a soft piece of shaped steel into a hardened tool capable of holding a sharp edge. It’s a delicate balance; too hard and the axe will be brittle, too soft and the edge will dull quickly.
Step 1: Normalizing and Hardening
Before the final hardening, it’s wise to normalize the steel. Heat the axe head to an even, non-magnetic temperature (a cherry red, checked with a magnet) and let it cool slowly in still air. Do this two or three times. This refines the grain structure of the steel and relieves stress from the forging process. For the hardening quench, heat the axe head to that same non-magnetic temperature one last time. Then, swiftly and decisively, plunge only the cutting edge (the first 1-2 inches) into a quench tank of oil. Canola oil works well. The oil cools the steel rapidly, locking its molecular structure into a very hard state called martensite. Do not quench the entire head, as this can make the eye brittle and prone to cracking.
Step 2: Tempering the Blade
The hardening process leaves the steel glass-brittle. Tempering is a process of reheating the steel to a much lower temperature to trade some of that extreme hardness for crucial toughness. Clean the hardened part of the blade with sandpaper so you can see the bare metal. Gently heat the thick body of the axe with a torch, allowing the heat to slowly creep towards the edge. Watch the colors run across the clean steel. You are looking for a straw to a bronze or purplish-blue color to appear on the cutting edge (around 450-550°F or 230-290°C). Once you see the desired color, quench the entire head in water to stop the process. This leaves you with a hard, sharp edge and a tough, shock-absorbing body.
Step 3: The Final Grind and Hafting
Now the final, satisfying work begins. Using files, stones, or a belt grinder, carefully sharpen the edge. Create a strong, convex edge that is suitable for chopping. Polish the axe head to your desired finish, perhaps leaving some of the dark forge scale for a rustic, authentic look. The final step is to give your axe its handle, or haft. Ash and hickory are traditional and excellent choices due to their strength and ability to absorb shock. Carve the haft so the top is slightly oversized for the eye. The grain of the wood should run parallel to the blade. Carefully drive the axe head onto the haft, ensuring a snug fit. Finally, drive a wooden wedge (and perhaps a small metal wedge crosswise) into the top of the haft to expand the wood and lock the head securely in place. Finish the wood with linseed or tung oil to protect it from the elements.
Holding the finished axe in your hands, you feel its weight, its balance, and its history. You have done more than make a tool; you have participated in a craft that stretches back over a thousand years. You have connected with the spirit of the Norse smith, whose ingenuity and strength built a legacy in fire and steel. This axe is now a part of that story—your story.


